Domo Beginner's Guide
I. Overview of the interface
Domo's navigation bar is at the top of the Domo window, and each navigation option carries a different sidebar, as follows.
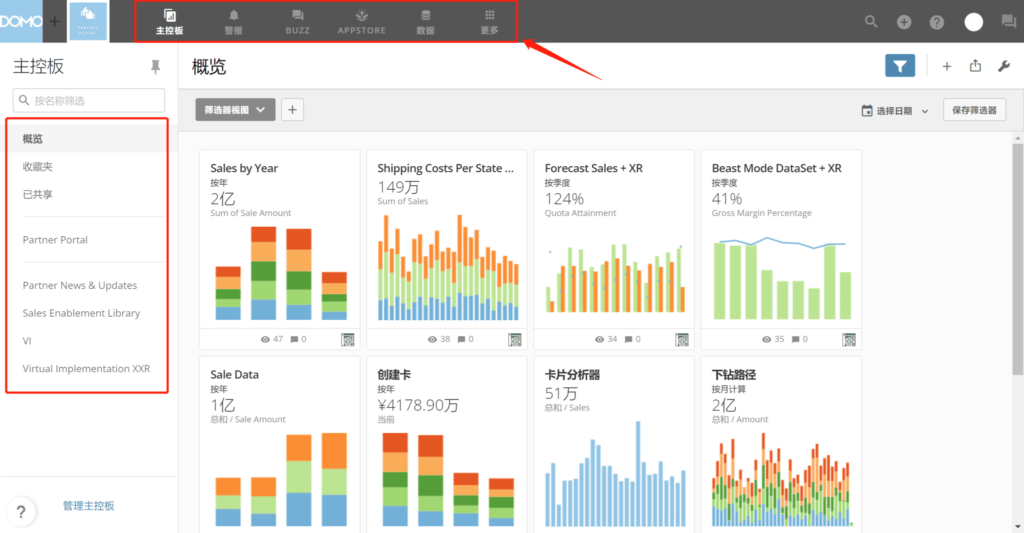
These navigation buttons are available throughout Domo. For almost all functional pages, except for special pages such as Analyze Views, the navigation bar is fixed at the top of the Domo window and can be easily switched. This includes the following:
- Dashboards: Open the Dashboard section of Domo, which is the "main" area of Domo where you can view all your data in the form of "cards".
- Alerts: Open the Alert Center where you can create, view and manage alerts. When business indicators change, notifications will be sent according to the pre-set settings.
- BuzzBuzz: Opens a full-screen view of Buzz, which allows you to talk to other members of your Domo instance.Buzz typically opens in a side panel view by default, and can be closed or expanded as needed.
- App Store: Open the Domo Appstore, where you can deploy different custom applications to your Domo instance on a quick start.
- Data Center: You can manage all your Domo data there, including DataSet, DataFlow, DataFusion, and more.
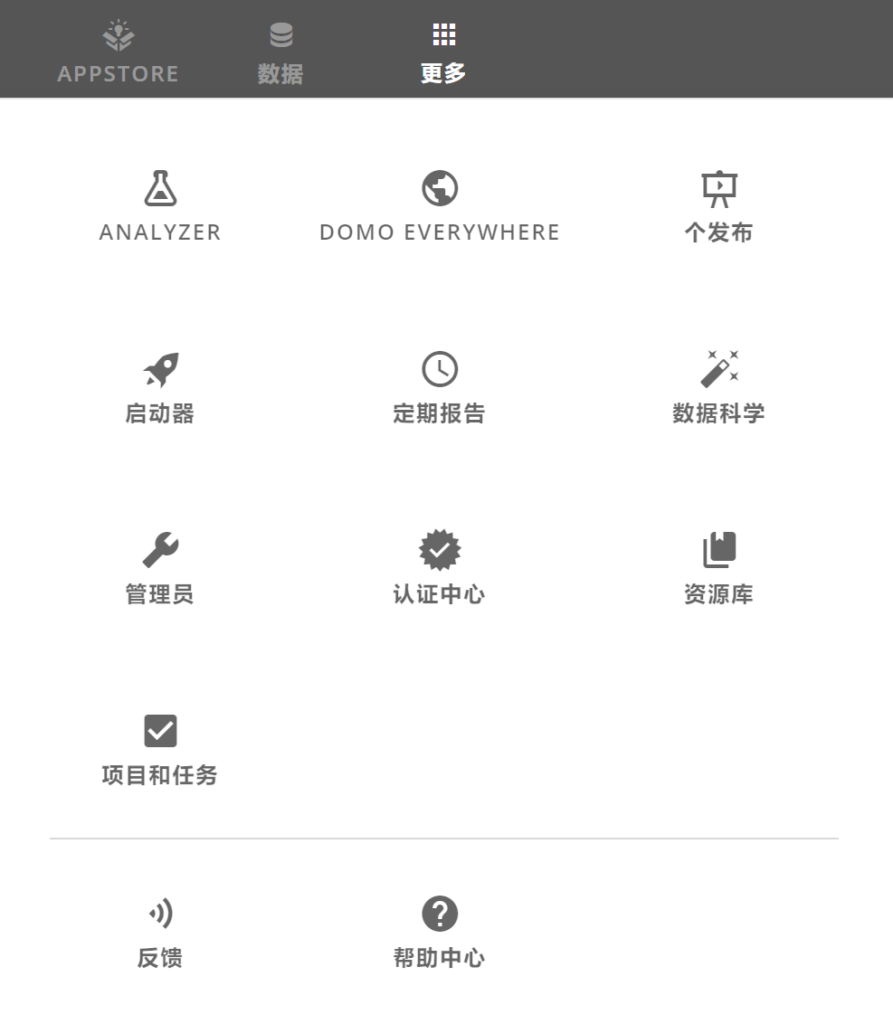
- more: Provides access to many additional navigations and tools not shown in the main toolbar, including: Administrator, Analyzer, Asset Library, Authentication Center, Launcher, Projects and Tasks, Releases, Feedback, Help Center, and more.
In the upper right corner of Domo, there are five tool icons for accessing different options. Like the navigation buttons above, these icons are generally available anywhere in Domo. Their respective roles are as follows:

- Search:Use to search for cards, pages, people, alerts, Buzz messages, applications, and more.
- Add:Add many objects to Domo shortcuts, including connector datasets, ETL conversions, cards, pages, people and groups, projects and tasks, and applications.
- Help Center:Any questions about Domo can be checked here.
- Personal:Opens a dialog box showing the user's recent Buzz messages, where the user's profile can be set.
- Talking:Turn Buzz on or off in the application window.
Adding Data Sets Using Connectors
When a dataset is added using a connector, the data is stored in Domo, which can be used to create multiple cards without specifying the connection information for that dataset in each card. When adding a dataset, the operator is implicitly designated as the dataset owner. The interface for adding connector datasets can be accessed through the Application Store, Data Center, or Add menu.
- Use the connector to add a dataset:
To connect data through the App Store, do the following:
1. Select Appstore from the toolbar at the top of the window.
2. Click the Search tab.
3. Click the Connector checkbox under Capability.
4. Use the search bar or page navigation to locate the connector you want to connect to, and then click it to open its details view.
5. Click "Get Data".
For some of the most popular connectors, the "Get Card" button can be used. This allows you to activate multiple pre-built time cards based on your data without having to configure advanced options.
- To connect to data through the data center, do the following:
1. Select Data from the toolbar at the top of the screen.
2. Select Connectors, File or Database depending on the type of connection.
3. Select the desired connector type.
4. Click the desired connector tile.
- To connect to the data by adding the menu "+", do the following:
1. Select "+" > Data.
2. Select a connector, file, or database.
3. Click the desired connector tile.
| Connector Type | descriptive |
|---|---|
| Connectors | The data is stored in the cloud in the connectors of third-party applications. Most of Domo's connectors fall into this category, such as Facebook, Salesforce, Adobe Analytics, and so on. |
| file | Used to pull files into Domo's connectors such as Excel, Google Sheets and Box. |
| Databases | A connector in which queries can be written to pull data from a database into Domo. such as MySQL, Amazon Redshift, and MongoDB. |
III. Making cards
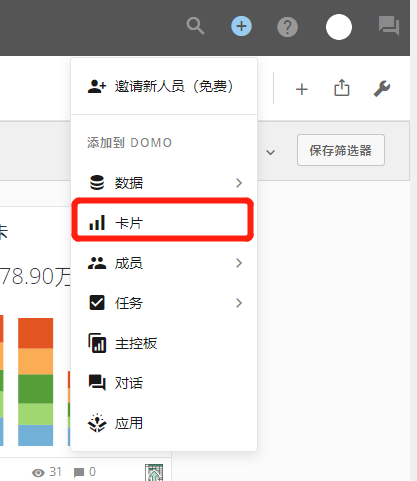
Click the "+" button at the top of the window > select "Card" > select "Visualize" > select a dataset > draw a diagram > save when finished drawing
IV. Sharing Content in Domo
- Shared Resource Access
When access to a card is shared with a user, a copy of the card is sent to the user's shared page; when access is shared with a group, a copy of the card is sent to the shared page of each member of the group. When access to a page is shared with a user, the page is added to the user's Dashboard list on the left side of the screen; when access is shared with a group, the page is added to the Dashboard pane of each member of the group.
- The operation is as follows:
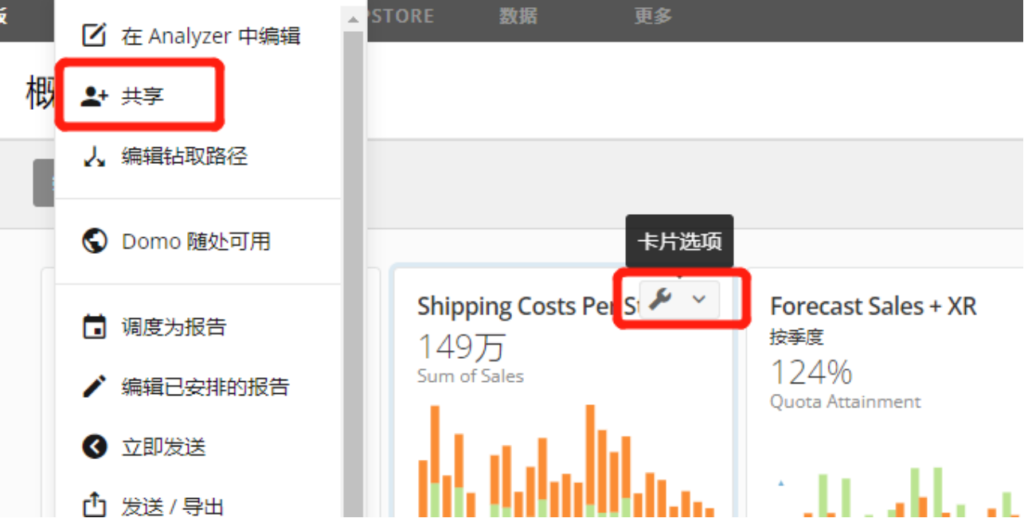
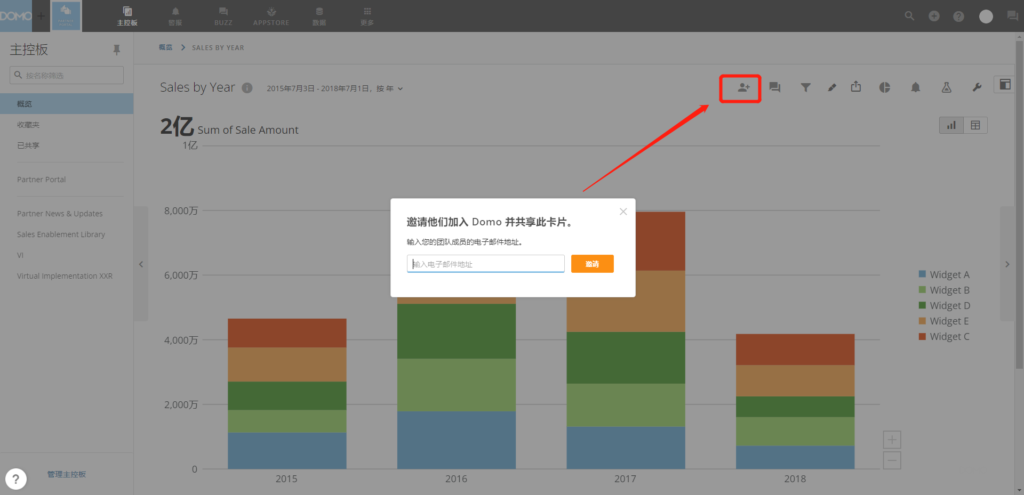
1. Hover over the card you want to share on the Overview page > click the wrench icon > click Share.
2. or on the Card Details page > click on "Invite" at the top.
3. Type the name of the desired recipient in the Shared field and a list of users or groups matching the query will pop up.
If the invited user has not joined Domo, an invitation link will be sent for that user.
4. Select the desired user or group from the list.
5. (Optional) Delete an added user or group by clicking the "X" to the right of the user or group name.
6. Add more users and/or groups by typing their names in the box and clicking Add.
7. (Optional) In the Message field, enter a message to add to the e-mail sent to the people with whom you share pages and cards.
8. (Optional) Uncheck the Send Email Notification box if you do not want shared recipients to receive email notifications that you are sharing content with them.
9. click to share.
The names of users and groups that can access this card or page appear in the list.
The shared page appears in the page options card row. Shared cards appear in the Shared page.
V. Chatting and collaborating in Domo
- To start a Buzz session, do the following:
1. Click the "Session Icon" in the upper right toolbar to open the Buzz window > Click "+" or "Session Icon" to create a new session.
2. In the Person, Group, or Conversation field, enter the name of the person or group with whom you want to start a conversation. This adds the name of the person or group to the field.
3. Open the "New Theme" tab.
4. Enter a name for the new topic in the Conversation Topic field.
5. (Optional) Specify whether this conversation is private or public.
If it is private, then only users who have added it to the filter box can see it. If it is public, then anyone in the company can see it.
6. Enter the initial message of the conversation in the Write Message field at the bottom of the dialog box.
7. Press "Enter" to send when finished.
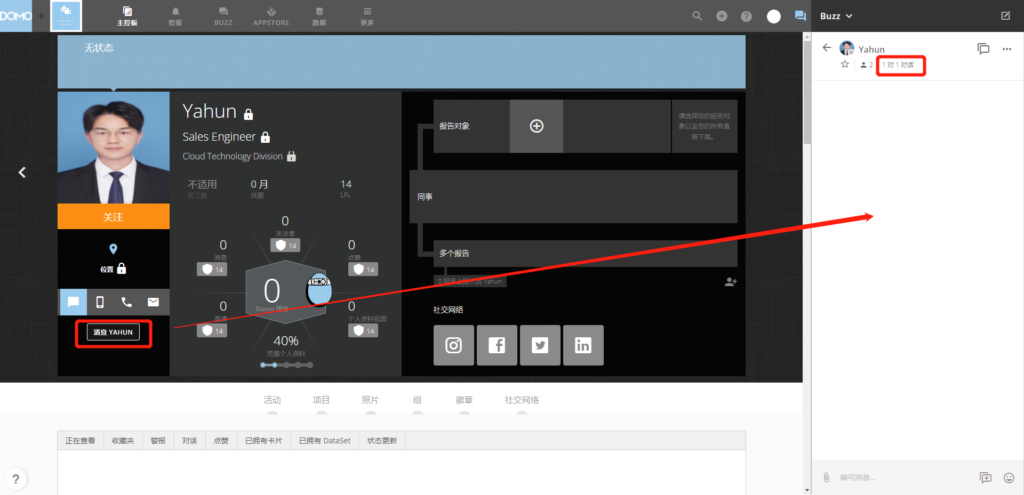
The conversation will be added to Domo and displayed in the Conversations tab of the Inbox, where it can be easily accessed. In addition, you can initiate a conversation with a specific user from the user's profile page.
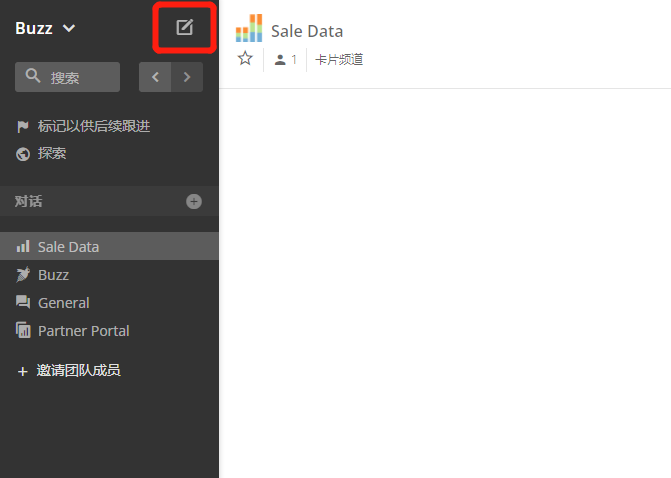
Invite new users to join Domo.
There are two main ways to invite users to join Domo, as shown below:
- Standard Invitation.The Domo interface includes a number of invitation buttons in various locations, such as the user profile page, the card details view, the analyzer view, and so on. If a user has the "Administrator" or "Privileged" default security role and is invited in this way, the new user will be brought into Domo with the default role set as an instance, which in the default case is automatically set to "Privileged". Privileged" in the default case. If the "Add New User" custom role is enabled and "Manage All Roles" is enabled, users can be invited to Domo and assigned to any custom role.
- To add a single user to Domo, do the following:
1. Click the "+" button at the top of the screen, and then select "Members" > "People".
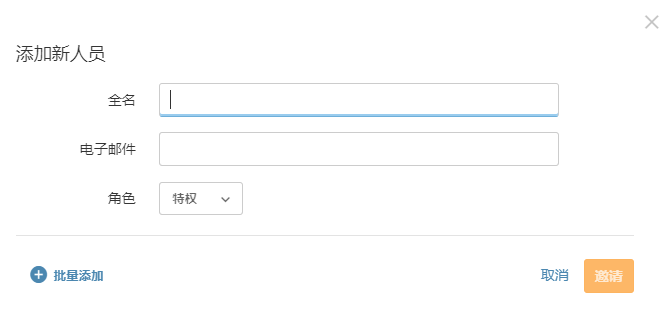
2. Click "Add New Member" and a dialog box will appear.
3. Enter the user's name and e-mail address in the appropriate fields.
4. Select the user's security role from the menu.
5. Click to invite.
6. (Optional) Enter the user's phone number, job title, and employee number.
If an error message appears indicating that a correct e-mail address is required and that the e-mail address you specified is in the correct format, it may be due to an unauthorized domain in the e-mail address.
- Batch add users to Domo
1. Navigate to More > Admin to open the administrator settings.
2. Click the Governance tab.
3. Open the Membership tab.
4. Click Batch Import in the upper-right corner of the People tab. The Batch Import dialog box opens.
5. Use the following format to create an import file in CSV format:
The easiest way to do this is to download the template locally by clicking on "Download Example" and then fill in the user information under the correct column headings. The "displayName" and "email" columns are required.
6. (As appropriate) If you want to add new people and update existing people at the same time, select "Add new people and edit existing profiles".
7. (As appropriate) If the import file contains user group data, to bring these groups into Domo, check the Create New Group box.
8. Upload the CSV file by dragging and dropping the CSV file into the dotted line area or by clicking Browse and navigating to the desired file on your computer.
Social User Invitation.When a user is invited to join Domo using the "Invite" option in Buzz, he/she will be given the "Social" security role. Social users can only access Buzz, their profiles, and projects and tasks, and can invite other social users to join Domo.
